Web To Lead Testing

Vicki
Last Update vor 3 Jahren
Here we're going to set up Web to Lead, and test it using a free tool called Postman (warning - this is a bit technical!)
Postman is an easy to use tool for (amongst other things) testing forms
We can use this tool to submit incoming leads via Web to Lead, without requiring the web guys to build the actual form on the website. And even if the form already exists, this tool lets us mess about with the fields and submit forms much more quickly.
Download (free) Postman here: https://www.postman.com/downloads/
Let’s set up Web-to-Lead if you haven’t already…
In Setup, find Web to Lead from the Quick Find box. Click on Web to Lead and in the main pane, you'll see a checkbox to enable Web to Lead. Click Edit and check it, if it isn't already.
Alongside the Edit button is a 'Create Web to Lead Form' button. Hit that and you'll see some multi-select picklists. Add the Use Round Robin field to the list on the right.
Then untick the 'include reCAPTCHA' checkbox. Ignore the Return URL field and click Generate.
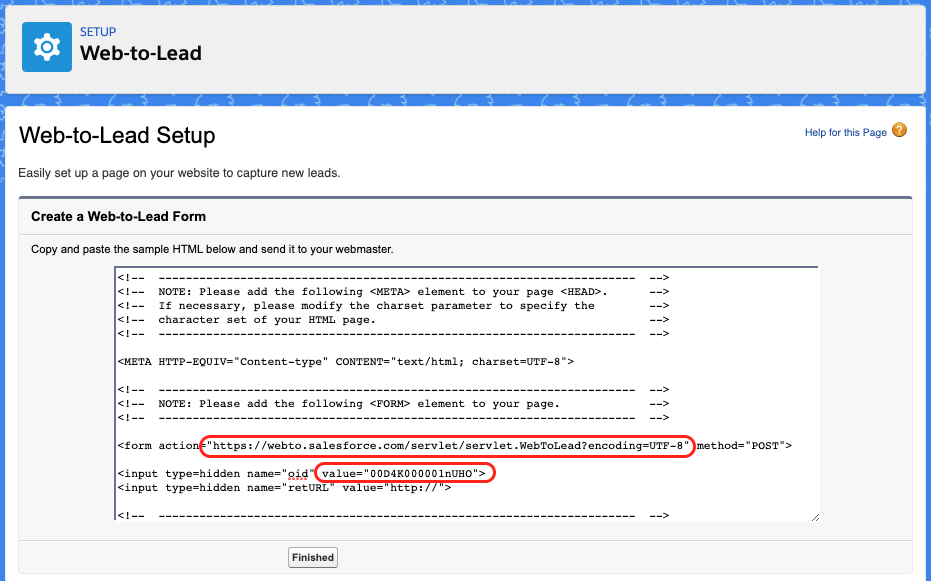
Leave this window open for now - we are going to want to grab the URL and the 'oid' values circled in red.
Submitting a test lead via Postman to your Salesforce instance
Almost there.
So you downloaded Postman; now install it if you haven’t already, and open it up. It’ll ask you to login - it’s pretty straightforward they don’t ask for much. Once you’ve done that, you’ll see a screen with a big orange ‘NEW’ button in the corner. Click ‘NEW’ and then ‘Request’ as per below:
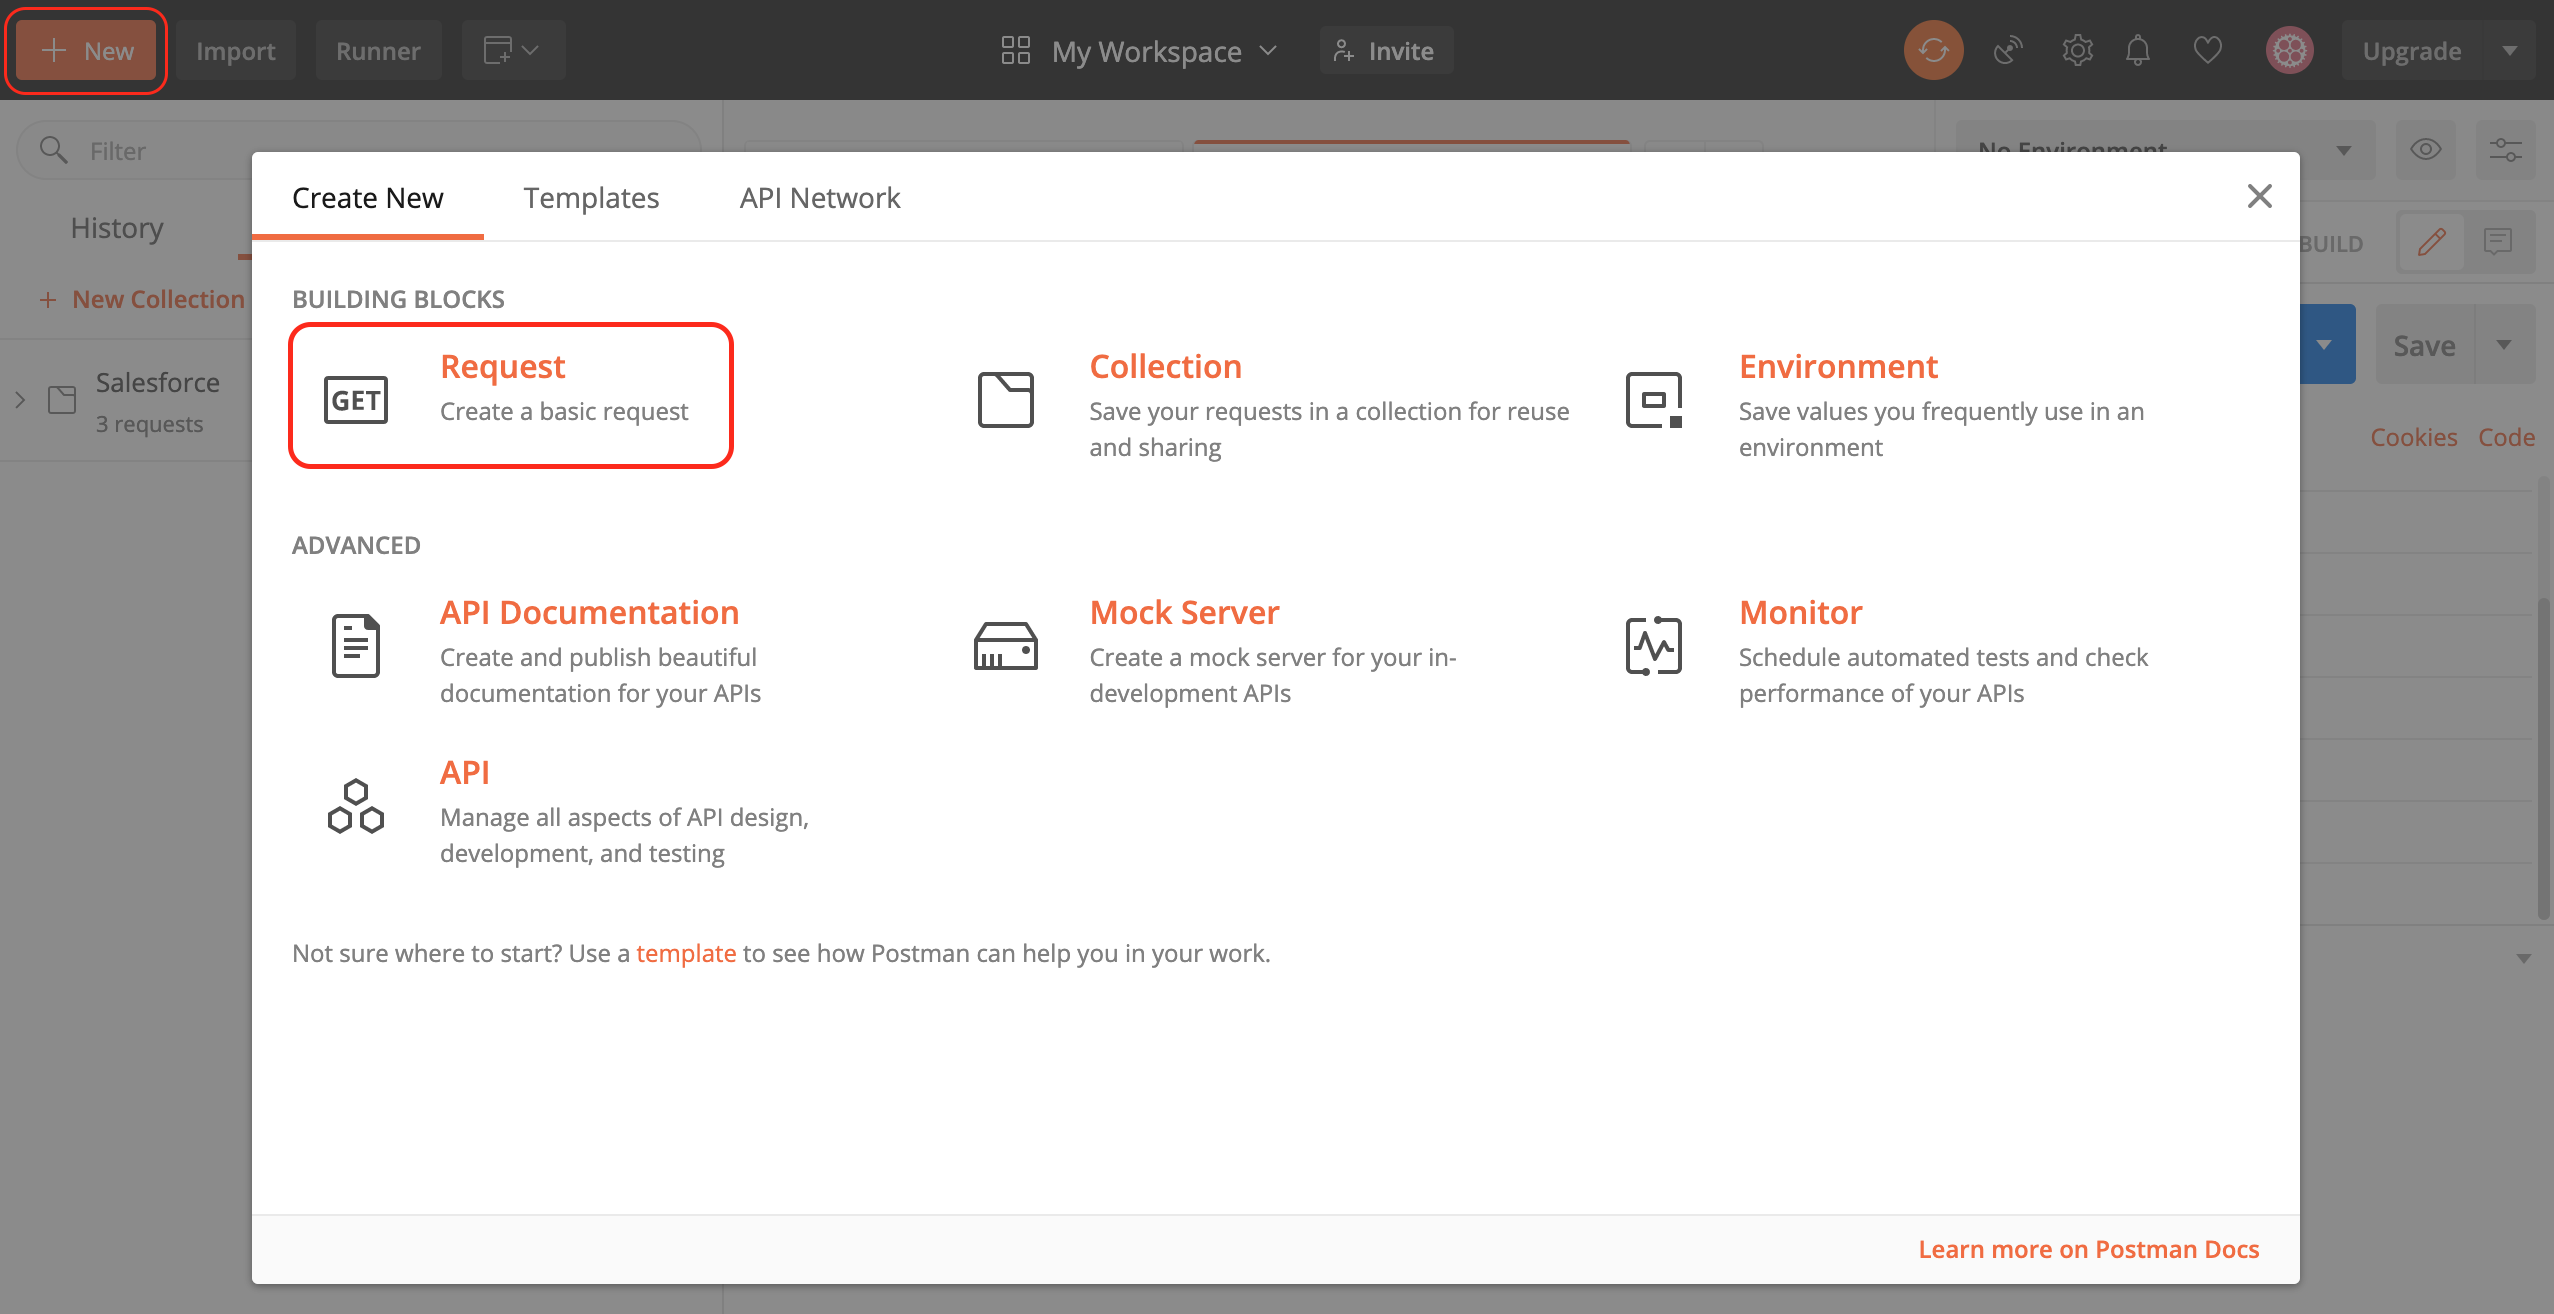
You'll see that Postman can be used for a ton of other things, but right now we're just here to make some test form requests. After clicking 'Request' you'll be asked to name the request, and save it to a collection. Once you've done that, you get to the interesting bit...
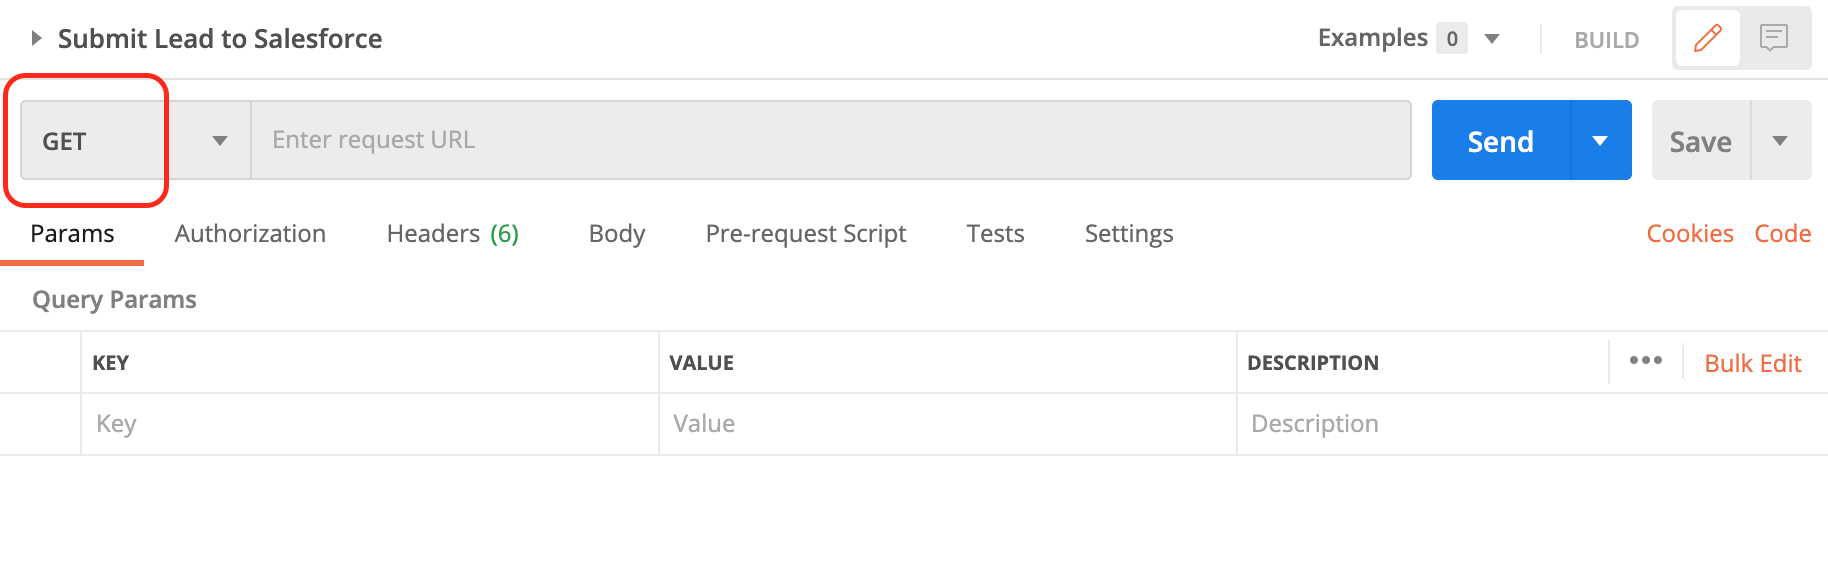
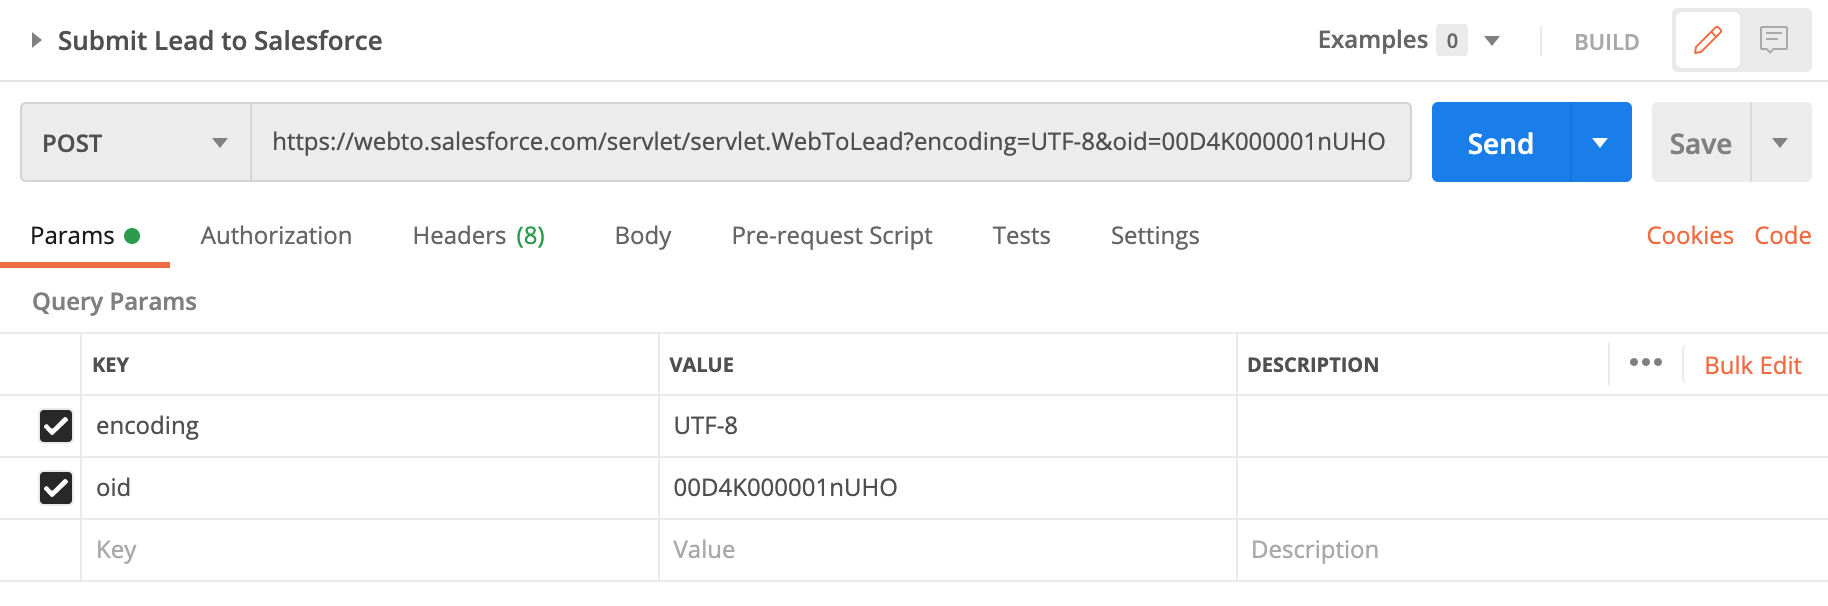
Click on GET and change it to a POST.
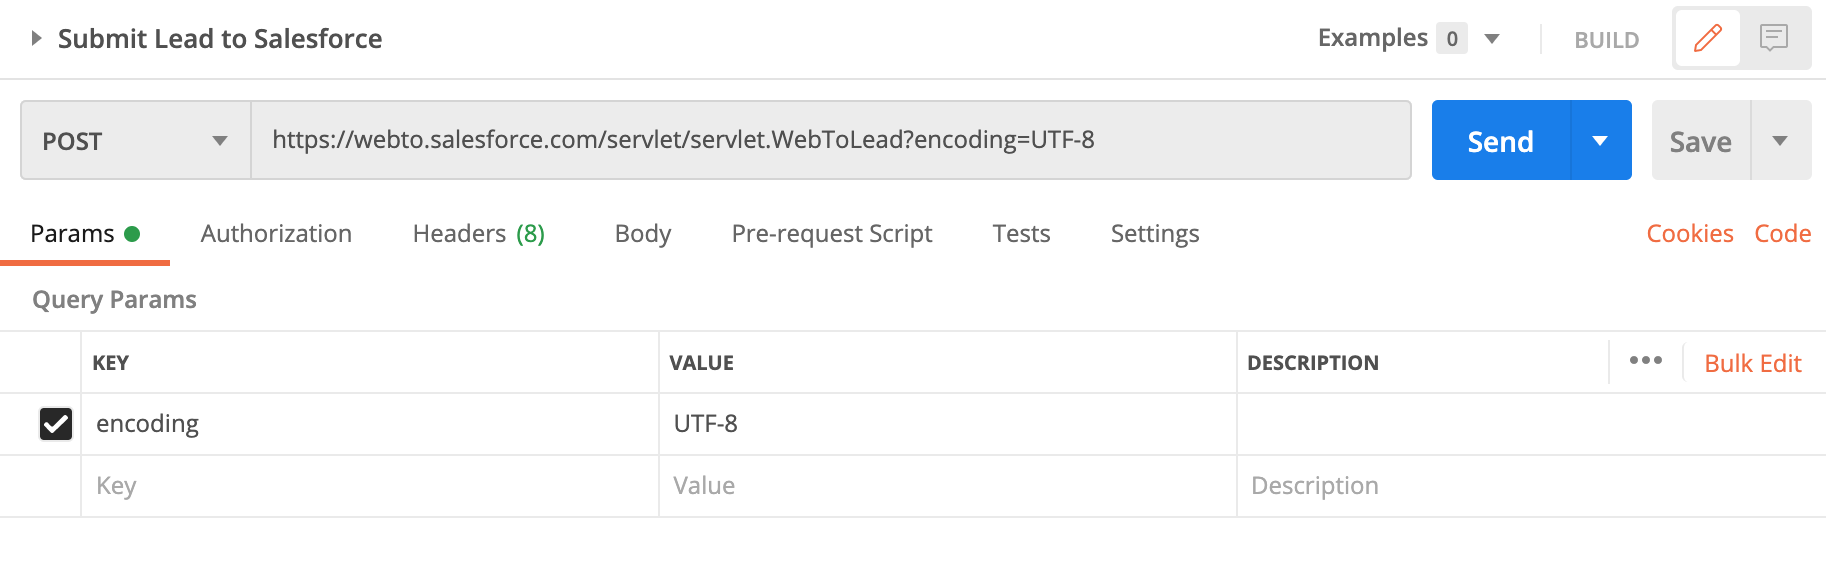
Then go back to your 'Generated HTML' in the window we left open, and copy the URL in the 'form action' line. Paste it into the box that says 'Enter request URL'. It should now look like this:
Then we need to find the 'oid' value in the 'Generated HTML'. That is what identifies your Salesforce instance. It'll look like this:
- input type=hidden name="oid" value="00D4K000001nUHO"
Grab that value and add it to the list of Key / Value pairs.
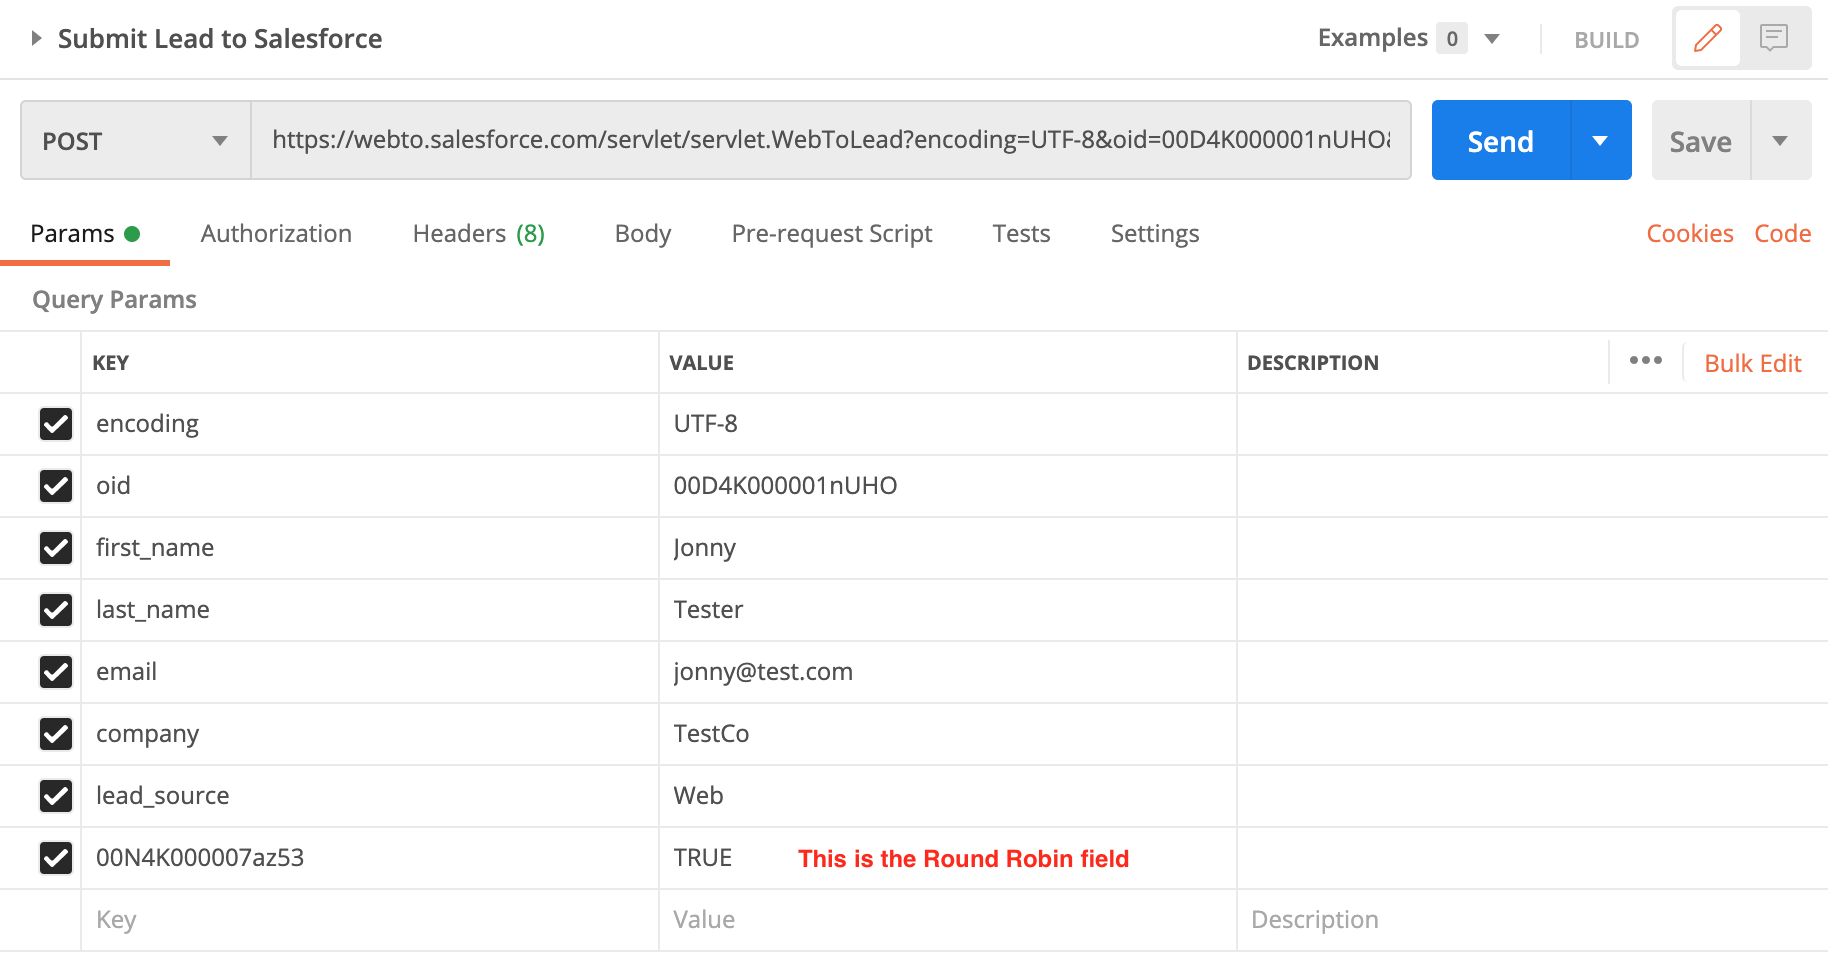
Now we just need to add the other fields that a lead form will normally have. We have to use the Lead API fieldnames here. If your org default (Lead.Use_Round_Robin__c) for SuperRoundRobin is TRUE, then you don't need to add it to the form. If it is FALSE, we'll need to add it to the form so that SuperRoundRobin knows to process the lead. Find the 'Use Round Robin' field in the Generated HTML.
The line in the Generated HTML will look like this:
- Use Round Robin: select id="00N4K000007az53" name="00N4K000007az53" title="Use Round Robin"
Put the value from the 'id' in the Key column, and TRUE in the Value column. It should look like this now:
You can save this for future use - it'll come in handy again I'm sure. All you need to do now is click on the blue Send button. If all is well you'll see this lead appear in Salesforce and if SuperRoundRobin is set up to match this lead, it will have assigned it as well. If it didn't work - have you done the Web to Lead Setup?
You’ll notice that the request in Postman is still there, you can change the values and hit SEND as many times as you like, to push more leads into your Salesforce instance. Once it is set up it’s great for testing web forms and more importantly, whether your leads are being routed to the right agents.